Data recovery from a Buffalo NAS using "Network Storage Recovery" software
For successful data recovery from Buffalo NAS, it's advised to follow the steps described below. Note that while the NAS is running, its operating system may write something to the storage and thus will permanently destroy the data. For most valuable data, it's advised to turn the NAS OFF immediately and switch to data recovery using a PC or contact a local data recovery service provider.
Step 1. Make sure the lost data is in safety.
To do this, close all programs that may use files from NAS shared folders, including Windows Explorer windows. Disconnect the computer and all other devices from this NAS. Make sure all potential users are warned and won't use this NAS after data loss and during the data recovery process.
Step 2. Download and install the software.
To recover data over a LAN, you will need to install the "Network Storage Recovery for Buffalo NAS" application on the computer connected to the same local area network segment as your NAS. It's strongly advised to establish wired connection to the NAS, not Wi-Fi one.
Step 3. Connect to the NAS.
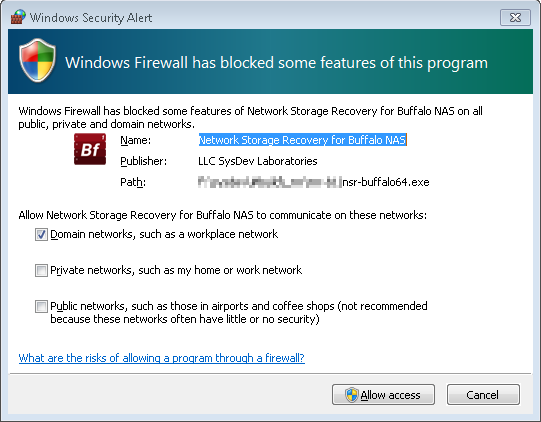
Start the "Network Storage Recovery for Buffalo NAS" application. Allow the software to communicate in the local/domain network in Windows Firewall:
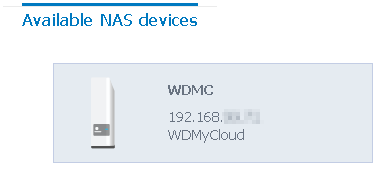
Make sure the NAS is displayed in the list of detected devices after the refresh operation is completed, like this:
If it is not:
- Make sure the NAS is connected to the network and it is in the same network segment;
- Try to search for the NAS with the "Buffalo NAS Navigator" application from your PC; try to diagnose connection issues.
Specifics of a Buffalo NAS:
To connect the to NAS, the software will use the Buffalo NAS Navigator protocol and authorization with the 'admin' user account. This authorization will be required on the next step. The required password coincides with the one used to log in to the NAS web interface with 'admin' user account.
Step 4. Log in to the NAS.
Select the NAS in the "Network Storage Recovery for Buffalo NAS" application and press "Next" to continue to the log-in stage. Enter the 'admin' user password. To protect the files on storage, it's advised to keep the option "Disconnect (secure) shared folders for lost data protection" checkedPress "Connect" to continue. If everything is correct, the software will connect to the NAS, install the "NAS Recovery Agent" module on it and will switch to storage selection.
Here, the following problems may occur:
- Invalid user password is entered. The software will signal this and will return to the "log in" dialog;
- NAS has incompatible hardware or firmware. In this case the software will fail to launch the network agent on this NAS (please report such issues);
- Network protocol (such as a vendor protocol, SSH etc.) can be blocked and inaccessible.
In case of success, there are the following important things to take into account:
- The Network Agent service is installed to the "temporary" memory and is not written to the storage; thus, it will not overwrite any user data;
- Some NAS firmware versions may have the "watchdog" function. After "securing" the storage with the "Disconnect..." feature this "watchdog" function may complain about a "broken storage" or "broken RAID". This is the normal behavior and such warnings should be ignored (if the NAS beeps, you may turn this off via the web interface).
Step 5. Storage selection.
Depending on the reason for data loss, there are the following options:
- Files deletion: simply select a file system volume in the "File system volumes" dialog (usually, this is a single file system);
- Formatted storage: select a file system volume like above;
- Failed/deleted RAID: switch to the "Storage devices" tab and check if RAID is available. If it is not, press "Add custom RAID", then "Define RAID manually (advanced)". This function allows virtual rebuilding a RAID of any supported custom configuration;
- Damaged file system: switch to the "Storage devices" tab and select the main storage device (this is the main (largest) RAID). Select it and continue to partition selection. Select the largest partition on it for scan.
If a file system volume is selected, there is an option to revise the file system contents before running any long data recovery operations. This also allows checking if the required shared folder is located on the selected storage in case there are more than one file system volumes.
Important: some NASes may use "spanned" configurations and the same file system volume will be detected on both the whole volume and its first component. In this case, select the largest volume of all detected ones.
Step 6. Starting data recovery scan.
For a hard disk or RAID, the "Start scan" function will be available immediately after its selection. For a file system volume, immediate access to scan start is an option (you may enable it by putting a checkmark into the checkbox near "Start scan after this step..."). In the volume file system explorer dialog, it is also available as the "Scan file system" tool.
The scan setup dialog has very simple settings:
- File name encoding for file system metadata (for folder records, containing file/folder names);
- Perform quick scan (recommended for quick recovery of deleted data);
- Search by known content; available only if the "quick scan" is disabled and is required for data recovery from Ext4 after format and in-deep search of missing data.
After setting up, just press "Start scan".
Important note 1: running full scan will take much time and the speed depends on NAS hardware performance. Thus, for deleted files recovery it's advised first to run "quick" scan and then return to full scan (if required) to retrieve the missing data.
Important note 2: NAS devices usually have limited resources and thus the Agent software does not use NAS memory for performing scan: the data is continuously transferred from a NAS to the controlling PC. For this reason, stable network connection is required during the data recovery process. Network connection breach causes interruption and cancellation of data recovery process by the Agent.
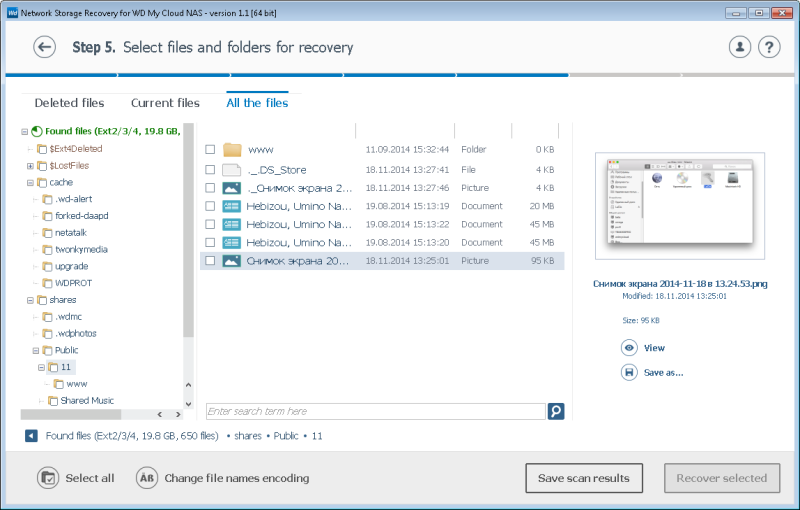
After the scan is completed, the software will open the scan result Explorer dialog window:
Step 7. Recovering data.
After the scan is completed, it's advised to save the scan result by using the "Save scan result" button. This will protect the scan result information from loss in case of network connection failures, system reboot etc. After software restart for any reason, the saved scan result can be resumed on the "Start scan" stage.
Use the file system explorer dialog to revise and find the data you are looking for. If it is not there, it may make sense to return to the previous stage and start full scan. If the data still can't be found with this software, it's advised to switch to data recovery using a PC or contact local data recovery service provider.
If the data is found, select the files and folders to be recovered using checkboxes and press "Recover selected" to continue.
Important note 1: don't attempt to save the recovered data back to the NAS immediately because this may lead to permanent data loss. Use an intermediate storage, such as a removable drive, internal disk of a computer or another NAS.
Important note 2: while copying smaller files may be completed with the help of a trial software copy, copying bigger files will require software license activation. The software is licensed "for each NAS" and using the software with a new NAS device for the first time will require ordering a new software license.
Step 8. Finishing data recovery.
First, make sure all the data you've been looking for is copied. This could be your last attempt to recover this information before its permanent loss. If all is done, it's advised to take the following steps:
- Close the "Network Storage Recovery" program on your PC. In case the software "secured" the file system volume, it will ask you to reboot the NAS. It's advised to agree to this request;
- In case the NAS was not rebooted, it is advised to wait for a few minutes and then reboot it manually;
- After all the data is copied and the NAS is rebooted, you may copy the recovered data back to the NAS (before that you may restore normal file system volume operations in case this was the reason for data loss).
Important note: The agent module (a) may intensively load certain ARM CPUs and (b) is another network service provider that could be subjected to network security leaks. That's why it is advised to reboot the NAS as soon as data recovery is completed. After rebooting, the Agent service on the NAS will be removed completely and the NAS will restore the same level of service as before Agent software installation.
 |
Download the Network Storage Recovery for Buffalo NAS application. |